Sunday, April 29, 2012

Miscellaneous: Pierre Herme's Frivolite Macaron

I'm not quite sure why I leapt into making PH's Frivolite macaron, which featured salted caramel and dried green apples. I already had so many things to do today! The lesson clearly, is that you must not delve into PH's delicious book unless you want to while away an afternoon!
I think part of the reason is that I'm making three new PH flavours with MB on Labour Day and this was part of my plan to get excited! The other reason is I'm a new aunt (well, aunt-once-removed, since it's my cousin's new baby) and I thought I would make a classic but pretty flavour to welcome little baby girl J into the world.
This recipe is a fairly simple one, without any staining of the shells. The first step was to cube a green apple, he calls for 8mm cubes, sprinkled with lemon and granulated sugar, then dried in a 90C oven for 1 hour.
This is really simple to do and the results are interesting. The cubes of apple shrink in and become chewy, almost like a soft, fiberous pillow. One thing about these small pieces is that they often get lost in the salted caramel, if I were to make it again, I would slice small coin-shaped rounds of apple and dry those to make for more bite in the macaron filling.
Of course, I was also tempted by other colours and patterns of shells, in particular his Chilli Chocolate macaron named "Hope", which featured red and white shells, each dripped with the alternate colour. The lesson here is to drip the alternately coloured batter while the shells are still wet and before they form a shell, then, like the green shells, the pattern will be part of, rather than built onto the surface (as in the white shells).
To my surprise, the shells came out roughly the same size. This is probably because the green shells were piped slightly smaller. This batch of macarons were also much fluffier than the last few, I've realized that if I whip the meringue at a faster speed but for a shorter period of time, the meringue volume is larger and the shells will get some air bubbles, but the texture is much lighter and aerated.
I also brought the baking time down by a minute, which produced a just-right texture. This was evident from the macaron height and the crisp yet delicately fragile feel of the underside of the shells. I knew they were good since my picky father praised both the look and taste of the macaron as "I must say, these are very good".
I matched up the green to the white shells and piped in the salted caramel buttercream filling. If you follow PH's salted caramel recipe, you will get a more caramel heavy filling, as he beats in butter, rather than butter meringue. His filling will be stronger, sweeter and denser, but probably more liquid, so the macarons will definitely be flatter but the apple pieces might be easier to discern.
I think they look really pretty in the mixed colours, don't you? I looked up the Frivolite recipe online and found the recipe easily available but most of the pictures of the macarons on blogs, to my mind, don't pass as macarons- either the filling is melted, the shells have no height or the bakers have taken real liberties with the colouring.

Monday, April 23, 2012

Miscellaneous: Attending the Savour fair in Singapore


I attended the Savour fair this past weekend in Singapore, which was held at the F1 pit building. Tickets were $42 each with $21 of those dollars redeemable in Savour dollars.

The ground level of the carpark had been covered in white marquees, with the more atas (high-end) restaurants and brands setting up stalls. There were local names like Gunthers and but also foreign names like L'Apage and Pujol and each restaurant was housed in a marquee and fronted by low table counters where staff hawked a trio of dishes. There were also booths manned by food-related brands like San Pelligrino and Acqua Panna.

All the restaurants were offering tastes of their 'specialties', like L'Apage, where we purchase their cold egg and tomato
What I found disturbing was, these places were charging obscene prices for a tiny smear of food- this thin slice of pork belly for example, cost $21 dollars! And so it went, each stall was $14 for a bit of this and $19 for a piece of that, all served in disposal little cups and bowls with plastic utensils.

I know that the idea was to introduce these signature dishes and foods to people who might not have the opportunity to travel to eat at these well-known restaurants. But I would have thought that even the chefs would have found it insurmountable to charge those kind of prices for the product. The portions were far less than what you would have experienced at the restaurant itself- for example, Gunther was offering, literally, a mouthful of their cold angel hair ostrecia caviar pasta for $19 but at the resturant, a full and far heartier dish of the same doesn't cost much more.

Some of the items were so small, it was laughable, for example, people were carrying expensive sushi maki or molecular xiao long bao around in miniscule cupcake wrappers. In the end, we had to wander over to the Chinese restaurants, like Hua Ting, that were offering more substantial plates of XO carrot cake and noodles.

You also blew through the Savour dollars at a slightly ridiculous rate, the books of tickets came in $3 denominations but the lowest price of any dish or even a glass of cider cost $9 and most of the food on the ground level cost $21 so you would use up an entire book of tickets on a thin slice of pork belly or thimble of cerviche. Thankfully the rain came pelting down and we had to migrate to the grandstand area where the exhibitions and classes were being held.

These areas were lots of fun to explore. Each floor had three exhibition areas and each would hold up to 20 stalls, selling everything from organic vegetables (Zhen Xin) to soy products, cupcakes, to macarons, to bread and meats. This is where, we discovered, we should have come for lunch. Food here was much more reasonably priced, $9 for a set of sausages from The Greengrocer or a toasted panini, to $6 for a slice of Windmill Pie and $6 for a coffee from Oriole. Even then, it was somewhat artificially priced in denominations of $3 and made items more expensive than they would have been in-store. I was happy to pay the premium to be able to sample different food businesses, many of whom operate from a home kitchen or suburban location, which I would otherwise not get around to ordering from and collecting.

There were two exhibition areas devoted entirely to wine and the import of various liquors and oils. Half of a floor was also taken up by 360 Foods, which had set up a make shift supermarket area, showcasing their fresh meats, hams, cheeses, oils and sauces. The clientele was primarily well-heeled, with many groups of young, PR-looking girlies and there was even a non-alcoholic and children's play with food area set up.

In the classes, the group was slightly more professional and with a culinary background (for example, several popular classes were oversubscribed and everyone in the 40 strong crowd owned a Kitchenaid). I saw several culinary entreprenuers and many bakers that I've met over the years. We attended two classes, a bread making class and a food styling class. Both classes (since they were free, I wasn't that judgemental) were very interactive and fun to attend. The bread class provided us with samples of flour, yeast and a generously-sized ball of dough each, to roll out and knead.

One thing that I felt could be improved was probably the logistics of the fair, particularly at the classes. While there were ample service people around, they were aimlessly directing traffic and didn't seem to have much control over the situation, the rooms nor the attendees. Also, the facilities were clearly lacking; for example, during the bread class, we didn't have the opportunity to make bread from scratch, nor to, at the end, make any bread product at all. Even with the instructor's lovingly prepared dough, we were not able to roll it evenly on the filmsy plastic white tables, nor did we get a really good scientific explanation to bread making, as was done in the bread and cheese classes I attended in New York.

In the food styling class, it was a struggle to get the session going and this was not for want of effort or preparation on the part of the teachers. There was one chef and one photographer, the chef was struggling to chop vegetables on a small plastic cutting board and cook inside an enclosed, indoor space, on a thin small pan, perched on an Iwatami stove, on a white plastic table. The space was limited and the smoke from the cooking had nowhere to exhaust, forcing the cook into a harrid agitation and a slap-dash feel to the recipe. The oil splattered across the tables and the condensation from the pan, because of the tight space, wafted up onto the TV screen where the photographs were being flashed- I don't think the set up really did the classes any justice and for such a large event, the staging seemed inadequate and ill-conceived, even though the talent and substance was good.

Although I enjoyed myself and found it a good use of the $21 entrance fee, I felt that the tone of the fair was extremely commercial and there were many aspects (the steep food pricing, the food proportion from the celebrity chefs, the staging of classes and the interaction of the stalls) that could have and hopefully, will be, tremendously improved.

Tuesday, April 03, 2012

Recipe: Chocolate Babka


I don't really remember how the obsession with Dean and Deluca's Chocolate Babka grew. I don't even remember who it was who first introduced me to the slab of light but chewy chocolate bread, or who made me take my first bite; I only have a hazy memory of carrying a thin plastic bag around New York and slowly but surely infecting each one of my university mates with an odd love for this loaf. In our household, we even came up with a formula for how much to dampen it and how long to nuke it in the microwave for, to achieve maximum softness and chocolate richness. I once had a friend from Cornell mail me loaves of babka bread. Always chocolate, never cinammon.


Now I can finally recreate the taste sensation, with an even better version, I think, then Dean and Deluca's. Babka is a cross between challah and pain au chocolat, a Jewish holiday bread made luscious with butter and chocolate. Although the recipe takes a while to complete, the risen airy lightness of the crust and the sweet, slightly alcoholic crumb of the bread, is entirely worth it . I was taught this recipe in a New York winter by my dear friend M, who shares the most soulful food, reviews and photography at her site, melissamansur.com here.


Be aware that you need time to execute this recipe. You have to rest the dough for two hours between making and rolling it into the babka. You then need another two hours let the bread proof within the baking tins. So the earliest you can eat babka from the time you start is at least four and a half, more like five and a half hours.

M. traditionally uses 60% Schaffen-Berger chocolate in this recipe so I have stuck to that, but I have also used 70% Arugani Valronha chocolate. I've got the best results from chopping the chocolate very fine (you otherwise get lumps of unmelted chocolate) and sprinkling a little sugar onto the chocolate, as the recipe calls for. I use a egg yolk and whipping cream wash for the surface of the bread as I find milk too liquid, it leave a dark stain rather than a glossy shine. In Singapore, there are two kinds of dry yeast that are easily available in stores, the first is Fleichmann's Dry Active Yeast (in yellow packagin) and the other is a European bread yeast. I use the former as I find the latter gives a very strong, sour yeast flavour. The recipe leaves you with excess egg whites, so use them for macarons or to make a frittata afterward!


Chocolate Babka (Source: Gourmet | December 2006)

For dough:
3/4 cup warm milk (105–115°F)
1/2 cup plus 2 teaspoons sugar
3 teaspoons active dry yeast (from two 1/4-oz packages)
3 1/4 cups all-purpose flour plus additional for dusting
2 whole large eggs
1 large egg yolk
1 teaspoon pure vanilla extract
3/4 teaspoon salt
1 1/4 sticks (10 tablespoons) unsalted butter, cut into pieces and softened

For egg wash:
1 large egg yolk
1 tablespoon heavy cream or whole milk

For chocolate filling
5 tablespoons unsalted butter, well softened
8 oz fine-quality bittersweet chocolate (no more than 60% cacao if marked), finely chopped
1/4 cup sugar


Make dough:

1) Stir together warm milk and 2 teaspoons sugar in bowl of mixer. Sprinkle yeast over mixture and let stand until foamy, about 5 minutes. (If yeast doesn’t foam, discard and start over with new yeast.)
2) Add 1/2 cup flour to yeast mixture and beat at medium speed until combined. Add whole eggs, yolk, vanilla, salt, and remaining 1/2 cup sugar and beat until combined. Reduce speed to low, then mix in remaining 2 3/4 cups flour, about 1/2 cup at a time. Increase speed to medium, then beat in butter, a few pieces at a time, and continue to beat until dough is shiny and forms strands from paddle to bowl, about 4 minutes. (Dough will be very soft and sticky.)
3) Scrape dough into a lightly oiled bowl and cover bowl with plastic wrap. Let dough rise in a draft-free place at warm room temperature until doubled in bulk, 1 1/2 to 2 hours.


Assemble babkas with filling:

4) Line two 8inch x 2.5 inch loaf pans with 2 pieces of parchment paper each (1 lengthwise and 1 crosswise).
5) Punch down dough with a lightly oiled rubber spatula, then halve dough. Roll out 1 piece of dough on a well-floured surface with a lightly floured rolling pin into an 18- by 10-inch rectangle and arrange with a long side nearest you.
6) Beat together yolk and cream. Spread 2 1/2 tablespoons softened butter on dough, leaving a 1/2-inch border all around. Brush some of egg wash on long border nearest you.
7) Sprinkle half of chocolate evenly over buttered dough, then sprinkle with half of sugar (2 tablespoons). Starting with long side farthest from you, roll dough into a snug log, pinching firmly along egg-washed seam to seal. Bring ends of log together to form a ring, pinching to seal. Twist entire ring twice to form a double figure 8 and fit into one of lined loaf pans.
8) Make another babka with remaining dough, some of egg wash, and remaining butter and chocolate in same manner. Chill remaining egg wash, covered, to use later. Loosely cover pans with buttered plastic wrap (buttered side down) and let babkas rise in a draft-free place at warm room temperature until dough reaches top of pans, 1 to 2 hours. (Alternatively, let dough rise in pans in refrigerator 8 to 12 hours; bring to room temperature, 3 to 4 hours, before baking.)
9) Put oven rack in middle position and preheat oven to 350°F.
10) Brush tops of dough with remaining egg wash. Bake until tops are deep golden brown and bottoms sound hollow when tapped (when loaves are removed from pans), about 40 minutes. Transfer loaves to a rack and cool to room temperature.


Cooks’ note:
Babkas keep, wrapped in plastic wrap and then foil, frozen 3 weeks.
Yield: Makes 2 loaves
Active Time: 1 hr
Total Time: 6 1/2 hr

Monday, April 02, 2012

Recipe: Flour's Famous Banana Bread


I am a big fan of banana bread; banana cake as well but not so much as a thick, sweet, chewy banana bread. I am such a big fan that I swear one of the reasons I miss travelling to Australia is they were such great purveyors of banana bread. It was almost like a national dessert,(I know, I know, pavlova, melting moments and baklava and all these other adopted things are considered the national desserts but the truly Australian one must be banana bread).

I'm somewhat of a traditionalist when it comes to banana bread, it has to have the right texture, more dense and sticky than cake, but sweeter and more cake-like than bread. I've tried all kinds of recipes and some disappointingly turned out more like cake and served better in wedges than slices. I've tried recipes with oil and with butter, with sour cream and with buttermilk (I've tried some without either but those tend to produce a very flat tasting cake-like texture), with walnuts, chocolates, cinnamon and nutmeg.

I can now truly say that I think I've found the best and my favourite banana bread recipe. Trust me, that's no small praise. Strangely, the providence of this recipe is nowhere near Australia, it comes from Chef Joanne Chang of Flour Bakery in Boston. Even more oddly, despite having quite a bit of time in Boston, I'd never heard of this bakery and was introduced to it's cookbook by a friend in Singapore who'd bought it at the Kinokuniya sale.

When I tasted the bread, I was delighted by it's rich texture and flavour. It had just the right mix of sourness and sweetness, cinnamon and nuttiness from the walnuts. It was also easy and quick to make and held it's shape well when baked, sliced and even frozen. I've since made the cake thrice and tweaked the recipe ever so slightly.

There were two very similar versions of the recipe, one from the cookbook and one via Food Network, so I used the cookbook recipe as a default. Here is the recipe, transposed with metric weights for convenience. The recipe doubles and triples easily, if you want to bake a sheet cake. I made one for my mum's qigong group which she served while warm, I was sure there would be leftovers from a 14x14 inch cake but it was all gone!

Flour's Famous Banana Bread

Ingredients
1 1/2 cups/ 210g all purpose flour
1 tsp baking soda
1/4 tsp ground cinnamon
1/2 tsp sea salt
1 cup plus 2 tbsps/ 230g castor sugar
2 eggs
1/2 cup canola oil
1 1/2 cup/360 grams or roughly 5 over-ripe bananas, half mashed and half sliced
2 tbsp sour cream
2 tsp vanilla extract
3/4 cup/75 grams walnuts, toasted and chopped

Method
1. Set the oven temperature to 350 degrees or 170 degrees C.
2. Line the bottom and sides of a 9x5 inch loaf pan, or a 6x6 inch square pan with parchment paper.
3. Sift together the flours, baking soda, cinnamon and salt
4. Beat the sugar and eggs with the whisk attachment on an egg beater until light and fluffy. Make sure the mixture is light in colour and truly thick and fluffy; it should take at least 15 minutes.
5. Drizzle in the oil; add it in a small steady stream so that it is gradually absorbed, do not add it all at once
6. Add mash bananas, sour cream and vanilla.
7. Fold in the dry ingredients and walnuts. For a better texture, try to fold in the flour rather than mixing it into the egg beater. If using the egg beater, do not overmix as the flour will work into a stiff gluten, which undermines the softness of the bread.
8. Pour into the lined tin, smooth the top and bake for about 1 hour. Check after 45 minutes. I find that it usually takes an hour for my oven, up to 1.5 hours if I double the recipe.
10. Keep warm at 100 C before serving.

Review: Club Street Social


Before we start, let me preface this review by saying that the owner-operator Min Chan is a friend and lovely girl. I don't think that makes me biased about the food or the establishment but it's also her birthday today so wouldn't it be great to send some culinary love her way?

Min used to work with Aun Koh, aka Chubby Hubby, and the eye for detail and knack for good food is apparent at Club Stret Social. The way the small space has been outfitted is just gorgeously evocative, the floor is tiled mosiac, the bar counter heavy volakas marble, the fair-faced brick wall gives way to cafe tables and chairs shrouded in the shadows of French iron wrought lamps. Tucked away on the quieter Gemmill Lane, it is the cooler, shadier cousin to the expat-heavy and mass-franchise driven Club Street. The quiet is reminiscent of the speakeasies of East Village or Chelsea.


Min says Club Street Social’s design is an amalgamation of design features from her favorite restaurants and the cocktails are inspired by legendary bars. The restaurant is just a stone's throw away, across the street from the upscale chowderhouse Luke's, but seems born of the same hip, city genre. When we arrived for dinner, I was a bit sceptical, Club Street Social has the same quaintness as King Street Cafe in Perth at night, and is the size of the bar area at L'Artusi in the West Village- I could imagine it packed to the brim, three-deep with a Saturday night drinking, pre-Filter crowd but what would the food be like?

As it turns out, the food is well-made with incredibly fresh ingredients and as trendy as the beautiful people slouched over the cafe counters. The menu specializes in sandwiches, crispy crostini, tramezzini and hot, toasted panini. We tried the salads ($15), grilled rib eye panini ($28), the proscuitto panini (S$16) and the lobster panini with yuzu mayo($28); they were amazing. Crispy, tasty bread, laced with huge chunks of ingredients and moist, juicy fillings. The premium paninis are particularly out-of-this-world, if I close my eyes, I can still imagine the burst of savoury flavour from the caramelized garlic and the smooth richness of the fontina on the tender ribeye, it was a lovely taste experience. The paninis are also a much better deal than the goat's cheese crostini, which is excellent but a tad pricey at $10 for 3 small slices.


You can also get the sinful bacon, egg and maple butter panini (S$14) and ciabatta toast with mascarpone cream (S$9) as an all-day breakfast item, which I would definitely come back for. The other stars are the cocktails, they are just labelled No. 1, Two, 3rd and so on but you can also get the bar staff to concoct a special for you. I thought at first glance that the bartenders were from Klee but was doubly impressed when Min told us that she trained all of them from scratch; none of them had ever worked in a bar before. The drinks are formulated to introduce some new tastes and sexy alcohols, #4 for example, is rye italian vermouth and vegemite, the #7 is a cognac, with bacon, date and walnut. The spiked pitchers are mixed with gin, lemongrass, galagal and pineapple, or cognac with red wine, nutmeg and ginger ale, like a festive wintry sangria.

Drinks are $16 for a cocktail and $49 for a spiked pitcher. The prices are a little steep if you're looking for a full dinner meal but not generally out of place for the area. Min has other partners but from what I can see, is extremely hands-on in the design, service and administration of the bar and food. Bring your most deserving friends and make her day by paying her a visit!

Club Street Social
5 Gemmill Lane
069261 Singapore
www.clubstreetsocial.com

* Pictures from TimeOut Singapore via Maameemoomoo.com

Review: Crust Pizza


One thing about the new, varied demographics of Singapore- there are a lot of small food businesses. For example, just near my neighbourhood, I can buy morello cherry and pecan pies from a home vendor, Australian meat pies from a Gourmet savoury pie company, Peranakan favourites from elderly home cook and now, gourmet pizza from Crust Pizza.

Crust in Singapore is part of a franchise that started as a single store in Annandale, Sydney. They have 62 stores in Australia- despite being there twice a year, I never knew! (But then, as with many things transported, maybe in Australia, they don't consider this the best of the best). The franchise is already renowned across Australia for serving high quality, healthier pizzas made to order with the freshest ingredients. It was the first pizza franchise to offer gluten free bases and independently tested nutritional details on its top selling pizzas to customers both online and in store.


Forget about the more tame flavours, they are well-known for their Morroccan Lamb, which I didn't try on this occasion (but was ordered by my friend), their Paella and their White Prosciutto. The owner also talked about flavours developed for the Asian palate, which I assume is their Roast Duck. I'm not big on pizzas with Asian toppings but with 26 varieties, there's definitely something for all. I was impressed with their Magharita, the Wild Mushroom and the Salami pizzas.

Fortunately for me, we are in their delivery area but their radius is not very wide as they are concerned about delivered quality. They must be doing well, as within this small radius, the delivery took about 40 minutes (at peak dinner time, on a weekend) and the pizza was decently warm when it got to us.


I really liked that it tasted somewhat home-made, with a airy crust and good toppings of cheese pieces and vegetables. It was tasty but not overly oily, in particular, the oil didn't taste commercial, as it sometimes can with Pizza Hut, for example. The only drawback was that the prices are on the high side, averaging $24 a pie with a $3 delivery fee, for a 13 inch x 9 inch rectangular pizza (that's a long ruler by a short ruler) and the pizzas seemed like something you could make yourself, with a little elbow grease and a good bread recipe. Still, if I was a busy mother or had some friends for a casual lunch, this is definitely a service I would use from time to time.


Crust Gourmet Pizza Bar

Holland Village
34B Lorong Mambong
Holland Village
Singapore 277691
Nearest Parking: Lorong Liput, HDB Carpark
Telephone: +65 6467-2224

Monday to Thursday: 5.00pm to 10:30pm
Friday: 4.00pm to 1.00am
Saturday: 5.00pm to 1.00am
Sunday: 5.00pm to 11.00pm
Delivering: 7 days a week, 5 pm to 11pm

Upper Thomson
215R Upper Thomson Road
Singapore 574349
Parking on StreetTelephone: +6456-1555

Tuesday to Thursday: 5pm to10:30pm
Friday to Saturday: 11am to Midnight
Sunday: 11am to 11pm
Monday: Closed

* Pictures provided by Crust Pizza

Sunday, April 01, 2012

Recipe: Orh-nee Cheesecake


I first heard of this recipe from a friend, whose sister had copied it from the Straits Times. They were a Teochew family and as many do, they were big fans of 'Orh-nee' or steamed yam.

She was so proud of their home baking that she insisted I try some, which I did, hesistantly. One of my perculiar food dislikes is what I call mushed-bean textures. This means that a lot of Mexican foods and more inconveniently, a lot of Chinese desserts are off-limits for me. The list is quite wide, from refried black beans, to red bean, green bean, yellow bean, mung bean, 'ling yong' or yam soups or desserts. It isn't the taste that I don't like, but the mouthfeel of the starchy, pastey texture. (I love, for example, Indian yellow dhal).


I'll tell you a secret. When I was young (for this food dislike has been a long time in the making), at the birthdays of my grandparents, I would take the birthday buns- traditionally steamed 'ling yong' or lotus seed buns encased in sweet white dough and dyed a soft pink hue to resemble peaches, a Chinese symbol for long life and, lifting the long Chinese restaurant tablecloths, surreptitiously and gently lob it under the table. I've always thought about the little pile of buns that must have built up over the years.

Having had the good fortune to have been born Cantonese, where traditional desserts tend to be clear, thin, smooth and syrupy, this was generally not a problem. Nowadays, having married a Hokkien man, the deception has become harder. His family is incapable of appreciating that anyone can systematically reject all their traditional desserts and the concept of mouthfeel hardly seems a necessary or adequate explanation. I don't think they've noticed, for example, that I never eat mooncakes.


I've of course, never been a fan of yam, or taro, as they call it in the US and my idea of taro extends to about as extensively as pearl milk tea. But this orh-nee cheesecake (orh-nee is steamed yam, mixed with cream, oil and coconut milk and blended and steamed into a smooth but thick pudding) was actually not strong and it wasn't oily either. It wasn't delicate, but then, cheesecake generally isn't and it was flavourful. I dug up the recipe which was featured by Rebecca Lynne Tan (her sister was a friend of mine) and realized it was from a fellow blogger. You can find the recipe on her lovely site here.


My chance finally came this past weekend, my godfather, who is Teochew and loves orh-nee, was coming to dinner and I had leftover cream cheese and sour cream in the fridge. I bought three lovely Thai yams from the market (this recipe just needs two yams but I didn't know that) and was completely seduced by their gorgeous purple colour, if yam tasted the way it looks, I would totally be a convert! A tip to the wise; only the head of the yam steams into a beautiful, deep purple softness, the butt of the yam is where you get the striated pattern and dry hardness, like taro chips.

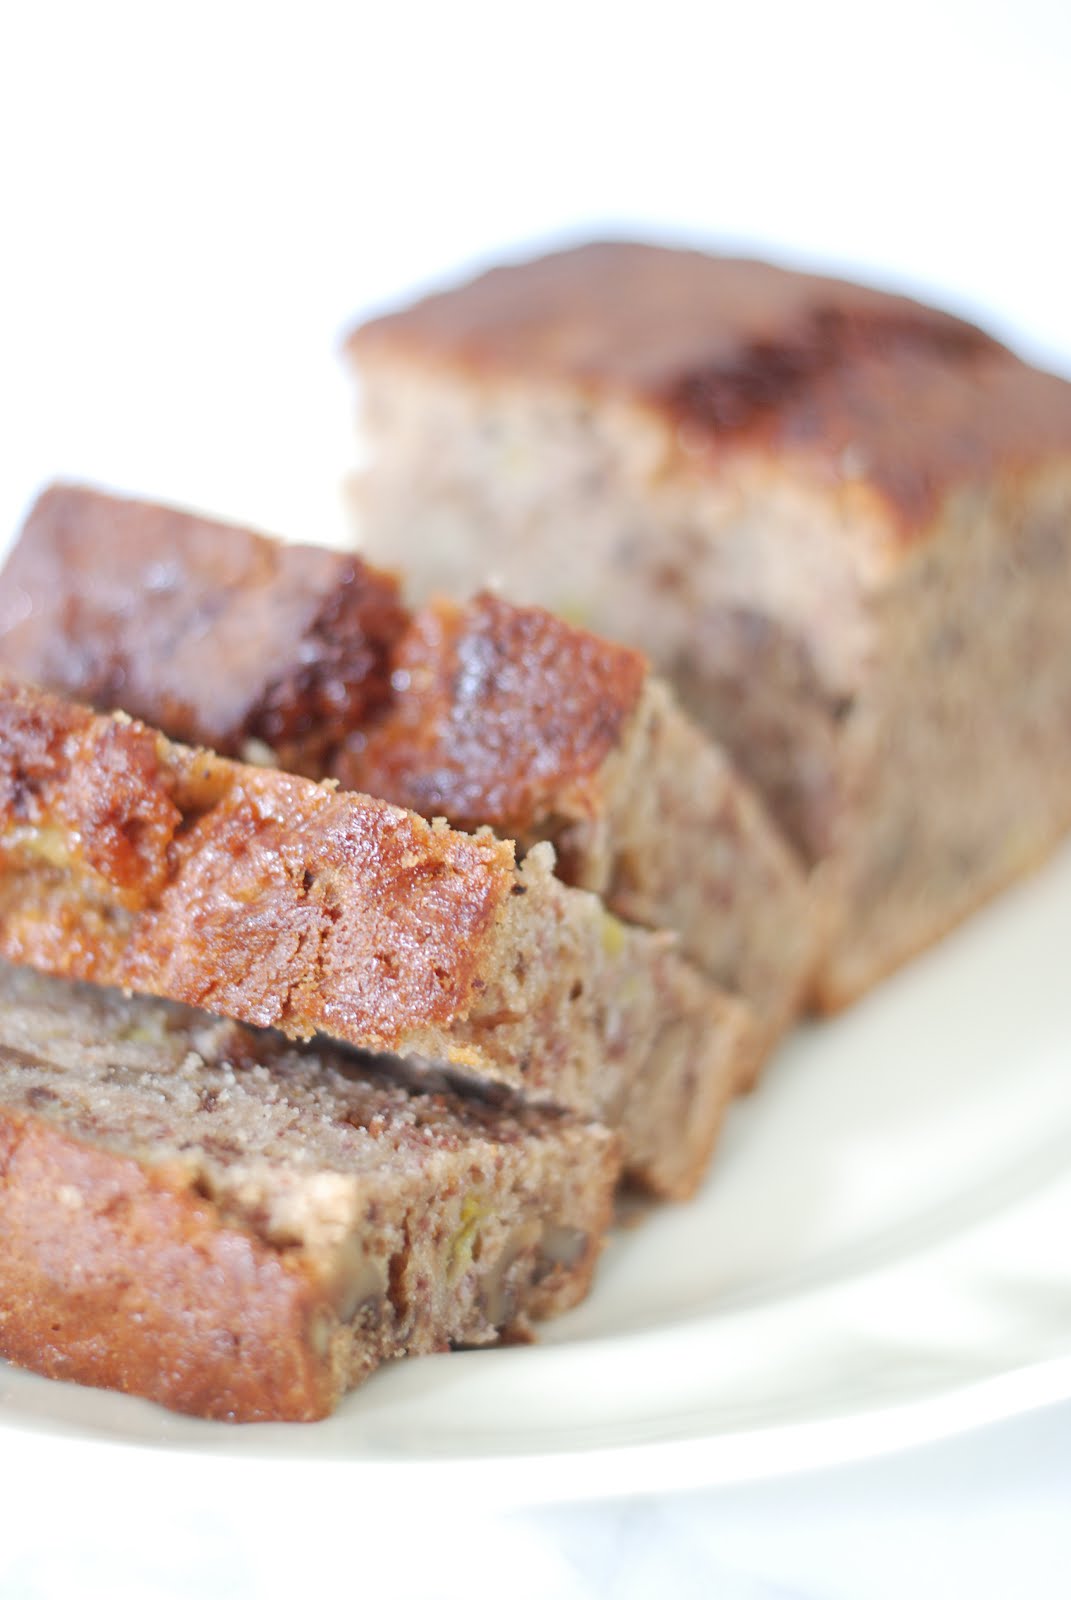
The most tedious part was probably peeling the yams, the recipe itself was a cinch and I particularly liked that you don't have to use a water bath in this recipe. I tweaked a little bit of the recipe but not intentionally, I used less butter in the crust, omitted the purple colouring and I only belatedly realized that I had halved the amount of cream cheese. If I were to do it again, I would whip the egg white first, then fold it into the yam to lighten and fluff up the texture. I would also peel and cut the yams before instead of after steaming and steam them wrapped with a few knots of pandan leaves to highlight the fragrance. There were fourteen for dinner and this dessert intrigued everyone, even those who like me, weren't a fan of yam. It was particularly popular with the older folk who liked that it wasn't sweet and it had a lovely baked, savoury-sweet aroma.


Orh-Nee Cheesecake

Ingredients
Cheesecake Base:
160g Oreo cookies (1 1/2 tubes of Oreos if you remove the cream)
50g butter, melted

Cheesecake Filling:
1 3/4 cup yam (about 2 medium yams, steamed for 30 minutes, then peeled)
1 8 ounce pack of Philadelphia cream cheese
120g castor sugar
3 Tbs corn flour, sifted
2 1/2 eggs
150ml whipping cream
1/2 tsp sea salt

Topping:
1 cup sour cream
2 Tbps sugar
3 Tbs coconut cream (Kara brand)

Method
1. Preheat the oven to 150C
2. Steam the yams for at least 30 minutes until soft.
3. Process the Oreos till fine, mix with the melted butter and press neatly into the base of a 9inch springform baking tin. You can also use a square tin and cut the cheesecake into slices.
4. Freeze the pan for at least 30 minutes until the base is set.
5. Puree the yam in a food processor until smooth
6. Beat the cream cheese and sugar till it is smooth and creamy, using an eggbeater. Add the eggs one at a time and add the corn flour. Beat until smooth. (This is where I would have whipped the egg whites separately and folded them into the mixture).
7. Fold in the whipping cream and add the salt. I used the processer to mix all the ingredients together, as it was just faster and more convenient. Unless you are going to beat the egg whites or whipping cream separately, it doesn't really make a difference if you process all the ingredients into a smooth batter.)
8. Pour the batter into the base and bake for 60 minutes.
9. The edge of the cheesecake should be set and the centre may still be a bit wobbly. Bake on a lower rack if the top starts to crack, this will help to keep it moist.
10. Whisk the sour cream, sugar and Kara coconut cream (santan) together and pour it over the cheesecake to form a topping.
11. Return to the oven and bake for 20 minutes. If you want a browned top, you can try grilling the surface of the sour cream topping.
12. Take the cake out of the oven but keep it in the pan till it cools completely. Chill in the fridge for at least four hours (I put mine in the freezer for two, as I was in a hurry). Unmould only when the cake is completely cooled through.
13. The recipe should serve eight slices but in today's calorie-concious society, the guests all carved really slim pieces, so there were easily sixteen slices.